ExFlow Post Control Rules workflow
The objective of the ExFlow post-control rules in the workflow is to establish specific conditions for determining when an invoice should undergo post control.
Post control gives the accounts payable team the option to add an extra layer of quality assurance either before an invoice is routed for approval, or before the final posting takes place. If the post control feature is activated in the general parameters, all invoices will be routed to post control.
However, the workflow enhances flexibility by only routing the invoices that meets the defined conditions of the workflow.
Select New Workflow
ExFlow | Setup | Workflows | Workflows
On the action pane click “+New”.
Select ExFlow post control rules V2 Type as a workflow type and open the newly created workflow.
Example Workflow
ExFlow | Setup | Workflows | Workflows
- On the left side under Workflow elements find “Conditional decision” and drag it into the center between “Start” and “End” of the workflow.
- Drag arrows from “Start” to “Conditional decision” and to a “True” and “False” to the “End” (figure 1).
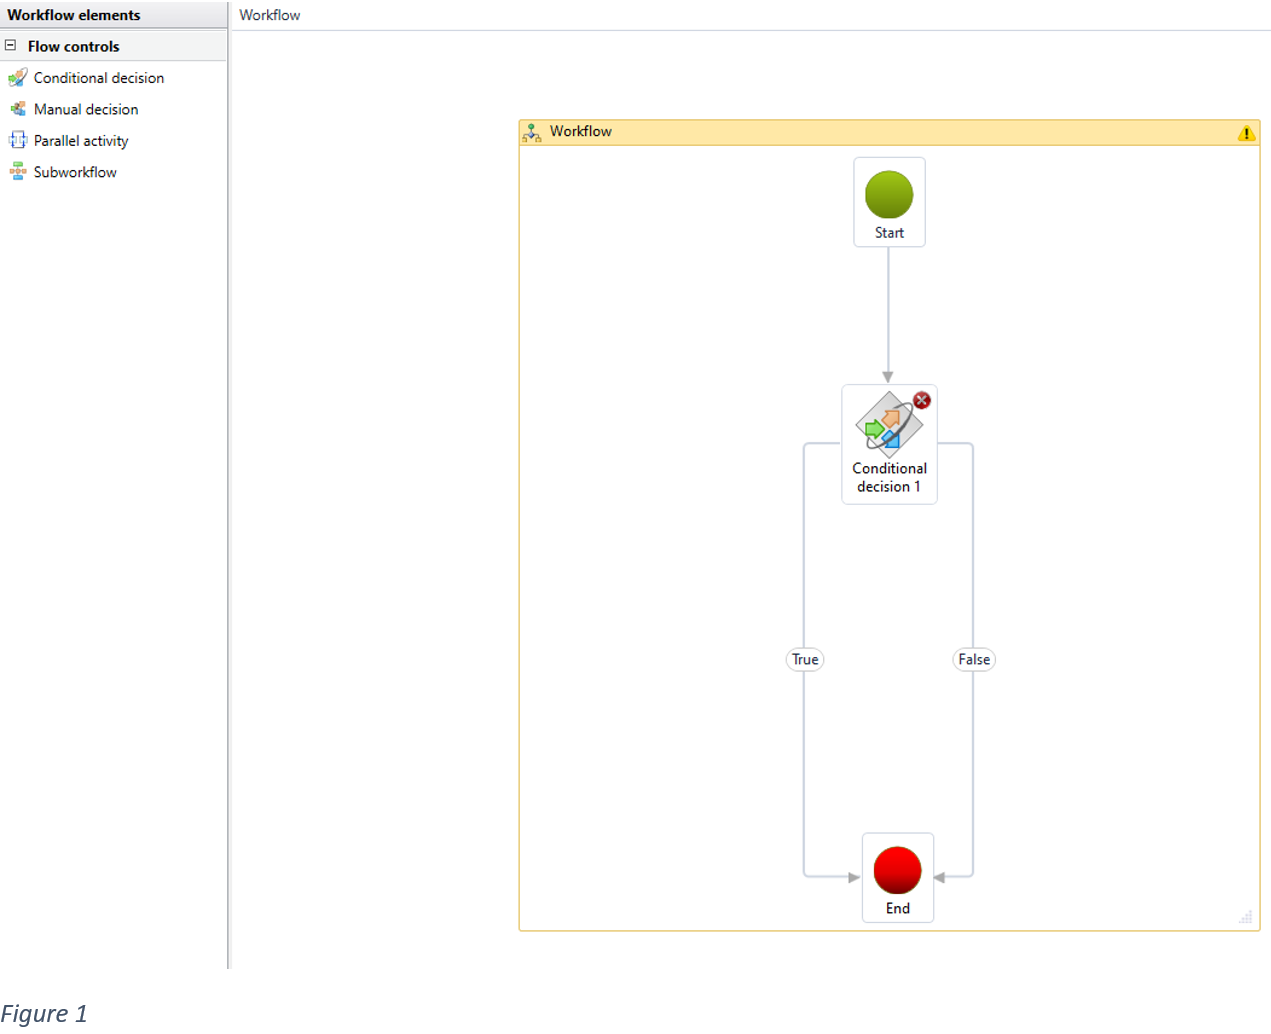
- To set a condition, double click on Exflow conditional decision 1 (figure 1). Then right click on the same box and choose “Properties”.
- The conditions might be defined by business needs. Ex: certain vendors need to be double checked before final posting.
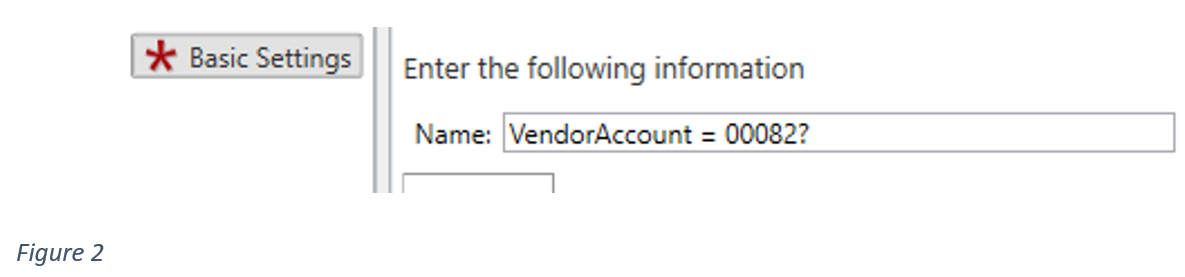
In this example we will set a condition where only invoices from vendor “00082” is routed to post control.
- Give the condition a name, preferable a name that explains what the purpose of the condition (figure 2).
- Define the condition(s) for when we want the invoice to be routed to post control.

- The finished workflow should look like this (figure 4):
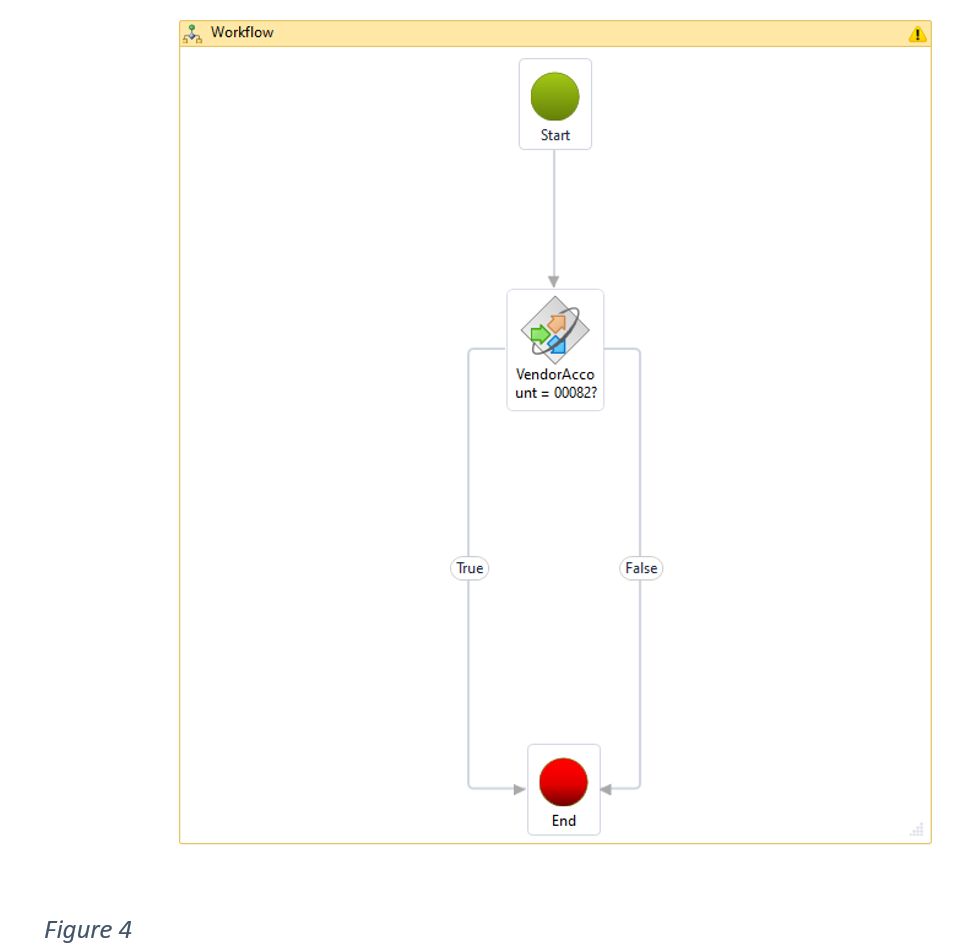
- Close and save the Workflow configurator.
Exflow will now automatically route all invoices that meet the set conditions (Vendor = 00082) to post control.
Example Workflow with multiple conditional decisions
ExFlow | Setup | Workflows | Workflows
- Drag two elements of “Conditional decision” into the center between “Start” and “End” of the workflow.
- Drag arrows from “Start” to one “Conditional decision” element, then “True” to second element and “False” to the “End”. From second element drag arrows “True” and “False” to the “End”.
- Set conditions for each elements. Workflow has to check if invoice meets both conditions and only then it will be sent to post control.

Example Workflow conditional decision with several conditions
- Drag “Conditional decision” element into the center between “Start” and “End” of the workflow.
- Drag arrows from “Start” to “Conditional decision” element, then “True” and “False” to the “End”.
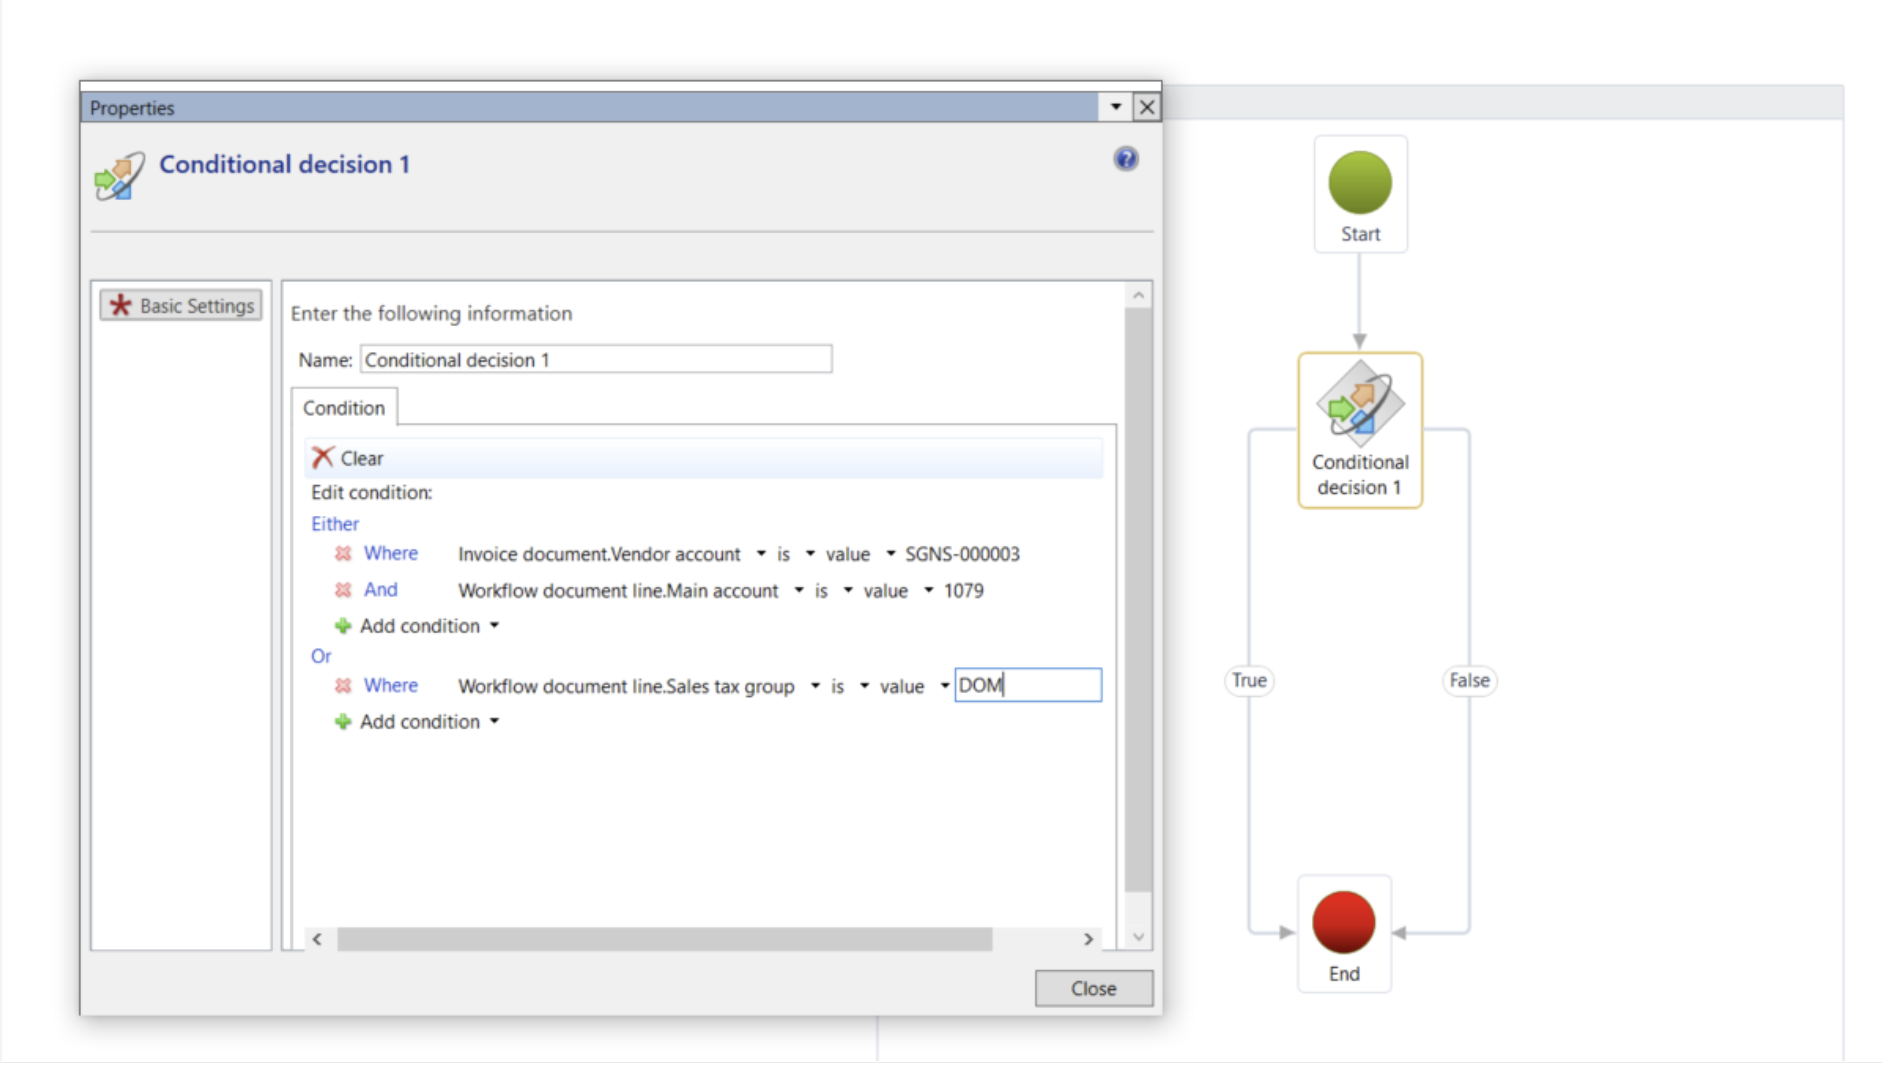
- Add several condition by clicking "Add condition" and choosing "And", "Or", "And either" depending on business needs.
- Define the condition(s) for when we want the invoice to be routed to post control.
Other possible business scenarios that can be built into the post control rules workflow:
- All invoices over a certain amount.
- Invoices with a specific “Invoice type”.
- Invoices with a foreign currency.
- Invoices with a specific pre-coding, such as main account or financial dimension.
- Fixed fields working as methods: Main account, Item, Misc., Project, Fixed asset, Procurement, Landed cost, Sales tax group, Item sales tax group, Accrual identification, Transaction date, Procurement Category.
- Changes in coding made by AP: Line(s) added/removed, Line amount changed, Ledger account/dimension/fixed assets/projects/item/charges/procurement category changed/removed, Sales tax group/item sales tax group/sales tax code changed, Accrual added/changed, Transaction text added/changed.
- All invoices approved by a certain approver.
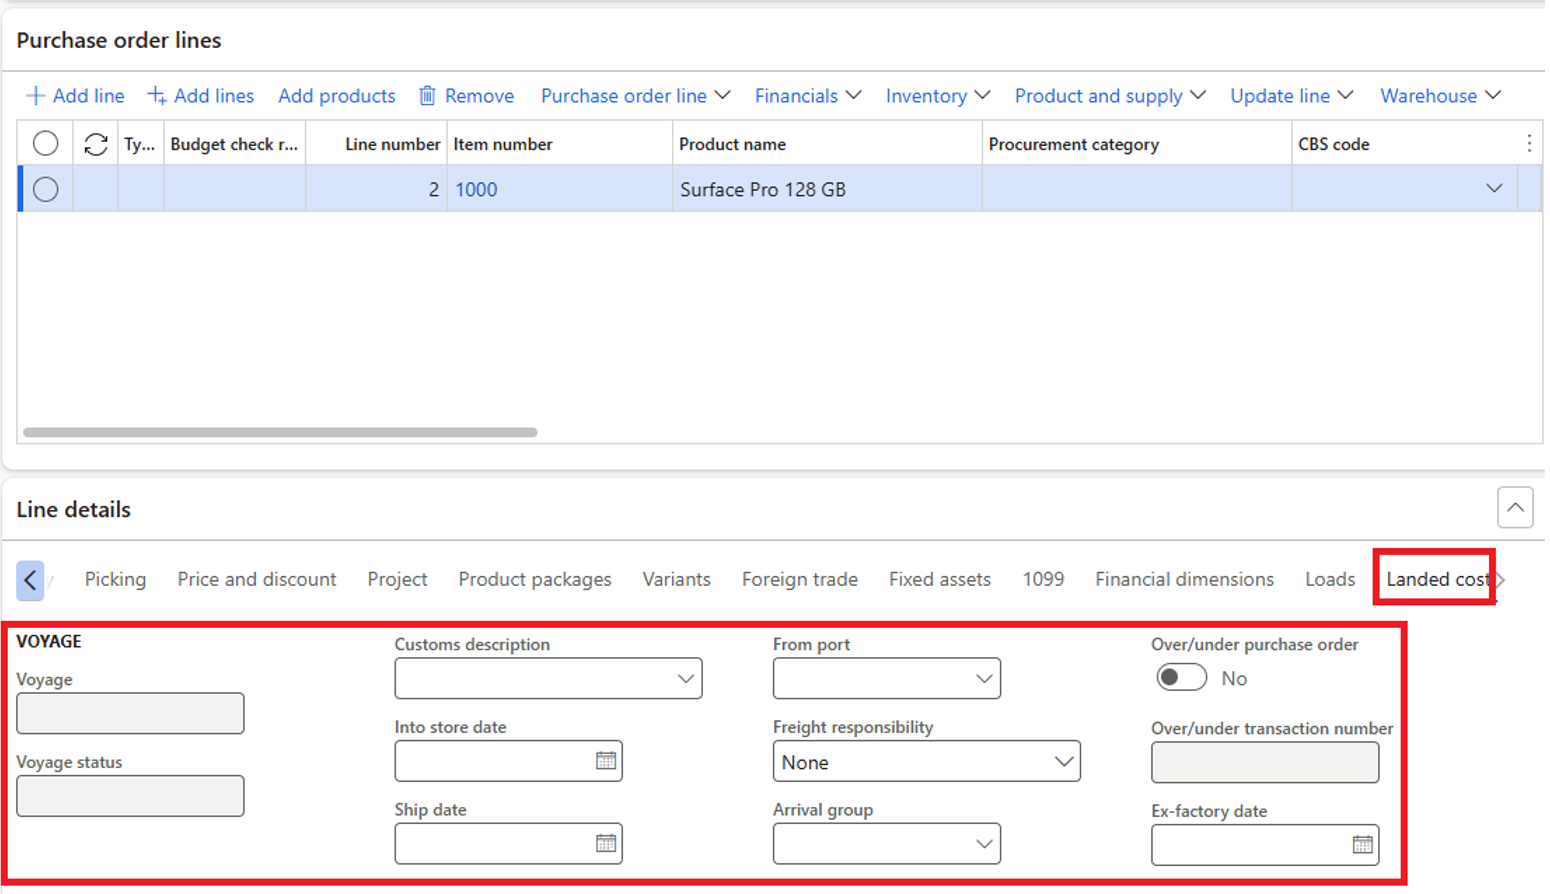
Added fields: Purchase order lines from ExFlow version 2.18 Voyage, Voyage status, Customs description, Into store date, Ship date, From port, Freight responsibility, Arrival group, Over/under purchase order, Over/under transaction number, Ex-factory date. These fields are found in PO line tab Landed cost: